Smart Inlet and Outlet Placement for Your Heliocol Solar Pool Heater
Getting the inlet and outlet connections right on a Heliocol solar pool heater can mean the difference between reliable warmth and chronic air locking. This article offers practical, installation-focused tips for plumbers, pool owners, and DIY installers working with Heliocol’s proprietary header and riser tube system.
Where Should the Inlet Be Positioned Relative to the Pool Pump?
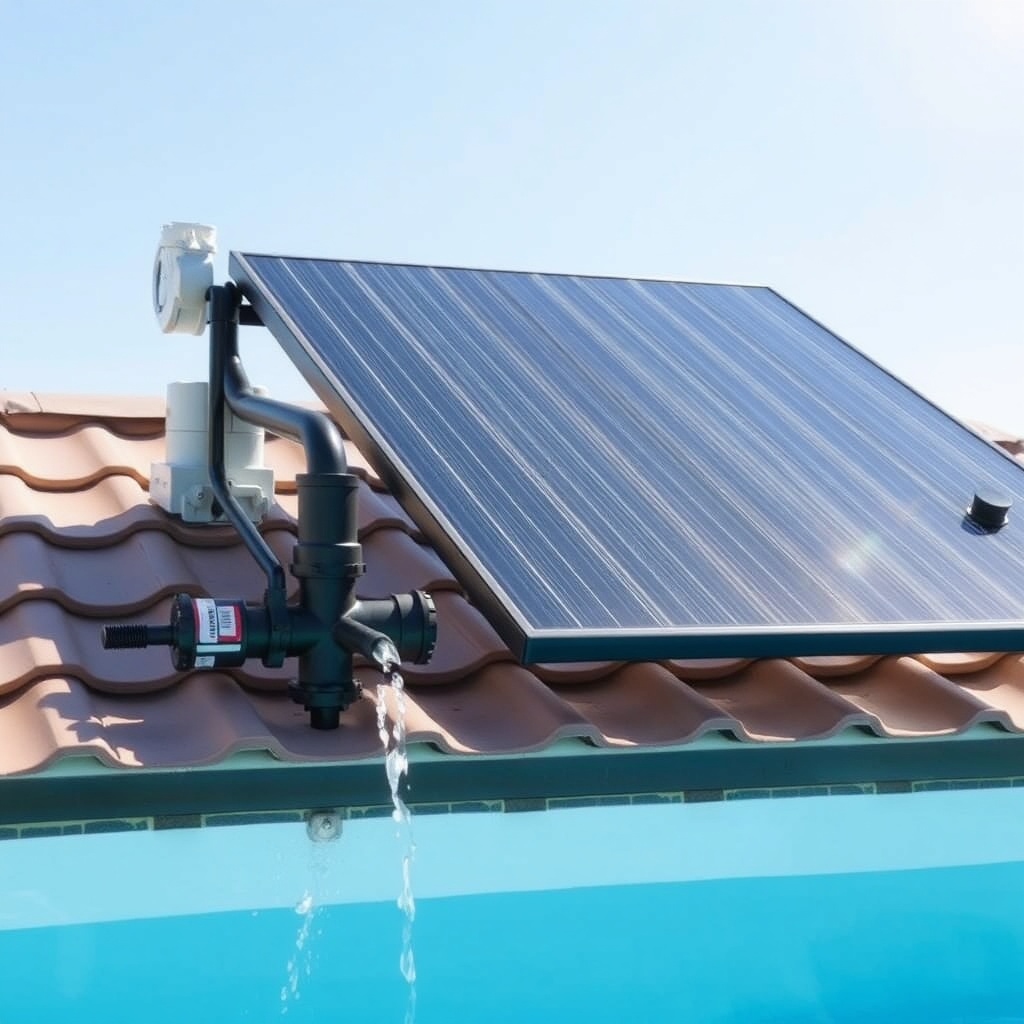
The inlet on a Heliocol system should be downstream of the filter but before any in-line chlorinators. Heliocol’s manual recommends the inlet header be at least 3 feet (0.9 m) from the pump discharge to allow turbulent flow to settle before entering the collector bank. This prevents excessive pressure spikes that can cause the header gaskets to weep over time.
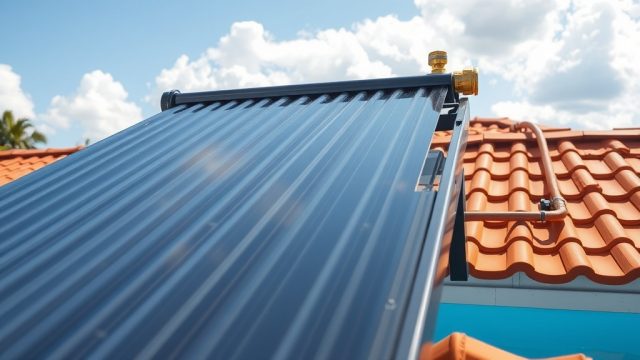
On the roof, the inlet header is always the lower header. This is critical: water enters the bottom of each collector panel and exits the top. If you accidentally pipe the return into the upper header, air will be trapped in the panels, and you’ll lose significant heating capacity.
Should the Outlet Be Piped to the Top or Bottom of the Collector Bank?
The outlet on a Heliocol system must be connected to the upper header manifold. This is not a suggestion; it’s a core design rule for all unglazed polymer solar pool heaters. Water enters the lower header, rises through the parallel riser tubes, and exits the upper header. This “bottom-feed” design ensures that any trapped air is naturally purged upward into the return line.
If you install the outlet on the bottom header, you will create a permanent air lock in the top of the panels. The system will still flow, but your heat output may drop by 30–50%, and you’ll hear gurgling noises as air churns inside the tubes. For existing installations, a manifold swap is usually the fix.
What Pipe Size Does Heliocol Recommend for Inlet/Outlet Connections?
Heliocol explicitly recommends 2-inch (50 mm) schedule 40 PVC for both the inlet and outlet headers on most residential installations. This applies to systems with up to six 4’ x 12’ panels (typical for 15,000 to 25,000 gallon pools). For larger commercial banks, 3-inch pipes may be needed, but that’s rare for home use.
Using 1.5-inch pipe creates a hydraulic bottleneck. The extra friction loss reduces flow by 15–25%, which directly lowers heat transfer because less water passes through the panels per minute. A summary of recommended pipe sizing appears in the table below.
Heliocol Inlet/Outlet Pipe Sizing Guide
| Installation Type | Recommended Pipe Size | Notes |
|---|---|---|
| 1–3 panels (up to 12,000 gal) | 1.5″ or 2″ | 1.5″ acceptable but 2″ preferred for lower head loss |
| 4–6 panels (15,000–25,000 gal) | 2″ | Mandatory for correct flow; see Optimal Flow Rate for Heliocol Solar Pool Heater |
| 7+ panels (commercial) | 2.5″ or 3″ | Consult Heliocol’s engineering guide |
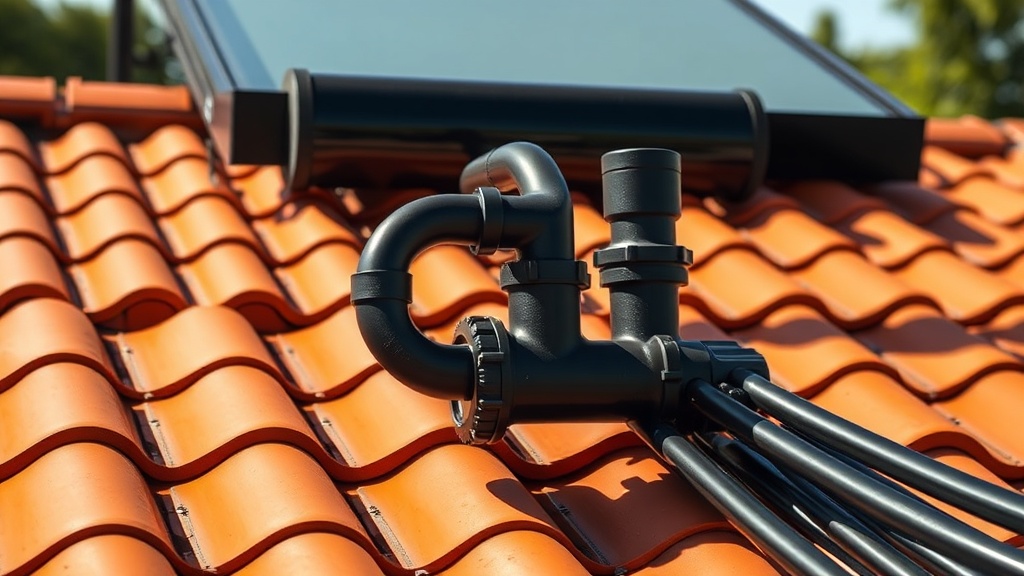
Always use full-port ball valves or gate valves on both the inlet and outlet sides. Never use standard PVC ball valves with 1.5-inch bores on a 2-inch line—they choke flow severely.
How Do You Prevent Air Locks During Initial Fill?
Air locks are the most common startup issue with Heliocol installations. When you first fill the system, the panels are full of air. If you immediately turn on the pump, the air has nowhere to go except to fight the incoming water. You can avoid this by installing a manual air vent or a small ¼-inch petcock valve at the highest point of the return manifold.
Alternatively, use this filling sequence: (1) close the valve on the return line, (2) open the valve on the supply line, (3) let water slowly fill the panels from the bottom while air escapes out the top return header, (4) once a steady stream of water exits the return port, close the air vent and open the return valve. This method typically clears all air within 30 seconds.
If you hear gurgling after several days, check for a small leak on a suction-side joint. Even a tiny air leak—a few bubbles per minute—can collect in the panels and cause persistent air locking.
What Are the Common Mistakes with Valve Placement on Heliocol Systems?
One frequent error is installing a check valve on the return line downstream of the heater. Heliocol panels are low-pressure and gravity-drain when the pump stops. A check valve traps water in the panels, which can lead to overheating on sunny days and accelerated UV degradation of the polymer material.
Another mistake is using a single three-way valve to switch between solar and main return without proper flow balancing. This often forces water through only part of the collector bank, creating uneven heating and “hot spots.” Always use two dedicated full-port ball valves—one on the bypass, one on the solar return—so you can isolate the system for maintenance and winterization.
For more on system selection, see Heliocol vs Fafco Solar Bear: Which Solar Pool Heater Is Best? to compare valve recommendations between brands.
How Do You Integrate a Solar Controller with Heliocol Valves?
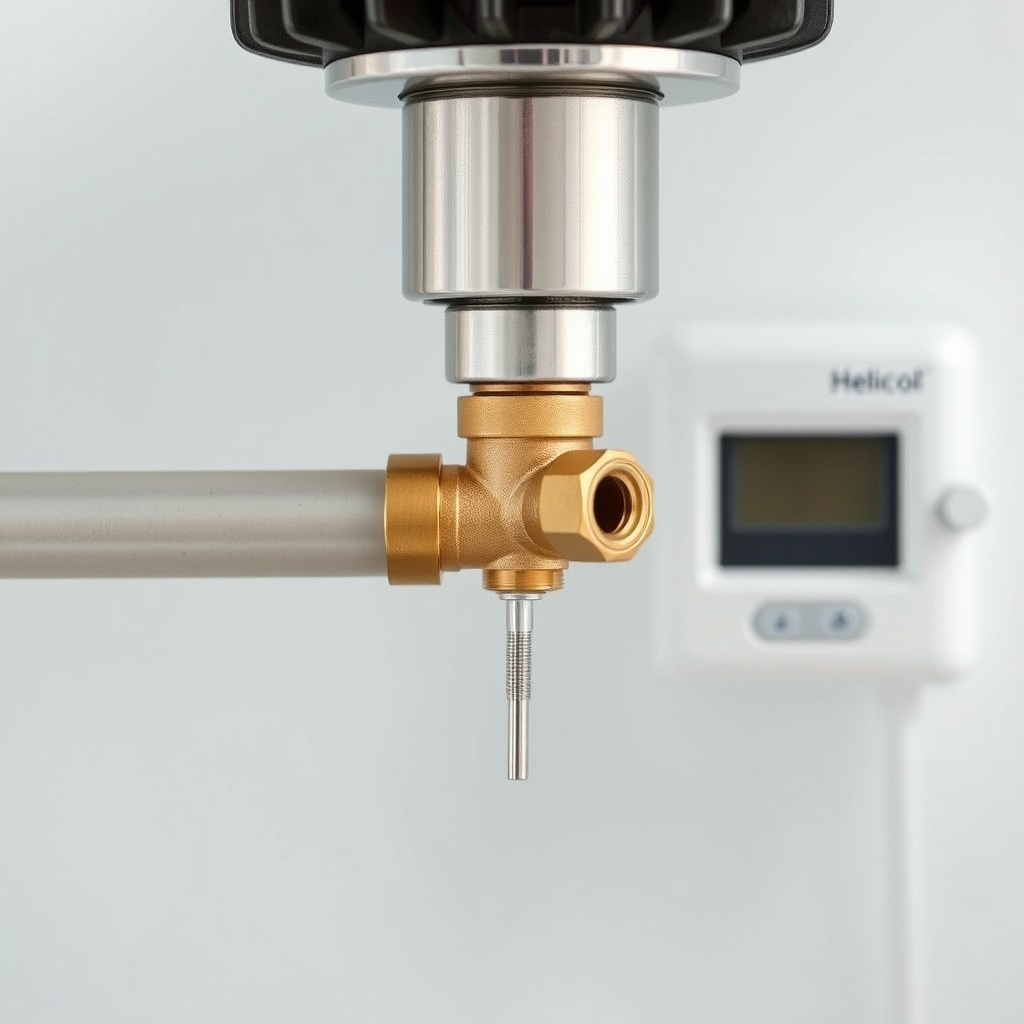
Most Heliocol installations pair with a differential temperature controller such as the Heliocol HC-100 or a third-party unit like the Pentair SolarTouch. The controller actuates a motorized two-way or three-way valve on the return line.
When wiring the valve actuator, ensure the controller’s sensor on the collector outlet is installed on the top header (outlet side), not the bottom. If you mount the sensor on the inlet, the controller will never see the heated water and may short-cycle or fail to enable heating. Also, keep the sun sensor (if equipped) shielded from morning shade so it doesn’t turn on the system prematurely when the panels are cold.
For long-term care, refer to How to Clean and Maintain Heliocol Solar Pool Heaters for sensor calibration tips.
What Owners Say About Heliocol Inlet/Outlet Setup
Experienced DIY installers and pool service pros share recurring observations about Heliocol plumbing. Here are two typical voices from online forums and service reports:
- “I used 1.5-inch pipe on my three-panel system because that’s what I had lying around. Flow was terrible—the pump ran at 20 PSI and the panels barely got warm. Switched to 2-inch pipe and the pressure dropped to 12 PSI, and water temperature climbed 4°F. Don’t skimp on pipe size.”
- “My first install I connected the return to the bottom header like a dummy. The panels rattled and never produced heat. A local Heliocol dealer pointed out the mistake and swapped the manifold connections in 20 minutes. Now it runs silent and heats the pool by noon on sunny days.”
Frequently Asked Questions
Can I use compression fittings on Heliocol headers?
Yes, but only if they are specifically made for polymer panel headers. Standard brass compression fittings can crack the plastic due to thermal expansion. Use Schedule 40 PVC slip couplings with primer and glue for the most reliable seal.
Do I need a union on the inlet and outlet for maintenance?
Absolutely. Install a union on both the inlet and outlet pipes within 12 inches of the header. This allows you to disconnect the panels for winter storage or replacement without cutting pipe.
What is the maximum vertical distance between inlet and outlet headers?
For rooftop installation, the vertical rise from inlet (bottom) to outlet (top) should not exceed the panel length. Heliocol panels are typically 4 feet tall (1.2 m) when tilted optimally. Excessive vertical lift increases air trapping risk.
Can I tee the inlet into an existing return line?
You can, but you must install a balancing valve on the bypass line. Without it, the path of least resistance bypasses the heater entirely. A manual ball valve on the bypass lets you adjust flow to the panels.
My Heliocol system has a slight drip at the outlet union. Is this urgent?
Typically not urgent if it’s a slow drip (less than 1 drop per minute). It often stops on its own after thermal expansion seals the threads. However, if it remains after three heating cycles, tighten the union ¼ turn or replace the O-ring.
How often should I check the inlet filter screen in the header?
Inspect the inlet strainer at least twice per year—once in spring and once in mid-season. Leaves, insects, and debris can clog the screen mesh, reducing flow by 50% without any visible sign on the filter gauge.