What Makes the Fafco Solar Bear Ground Mount Stand Out?
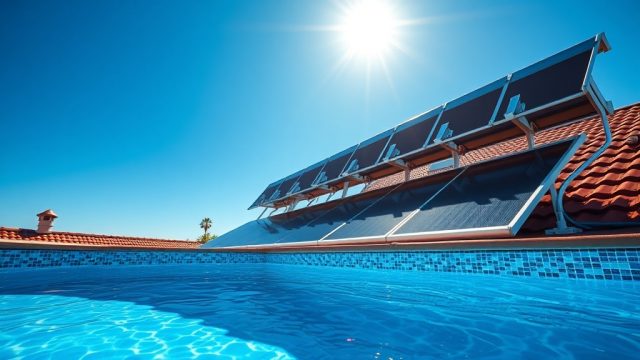
Installing a solar pool heating system on the ground rather than on a roof offers unique advantages, especially when roof orientation, shade, or structural concerns come into play. The Fafco Solar Bear ground mount kit is engineered specifically for the Fafco Solar Bear collector panels, providing a stable, adjustable framework that maximizes sun exposure. For pool owners who prefer a ground-level installation, this system simplifies maintenance, snow removal, and seasonal adjustments while delivering the same energy savings as a roof-mounted array.
This step-by-step guide walks through the entire ground mount installation process, from site preparation to final plumbing connections. Whether you are a DIY enthusiast or working with a contractor, understanding each phase ensures a durable, leak-free system that performs optimally for years.
What Tools and Materials Are Required for the Ground Mount?
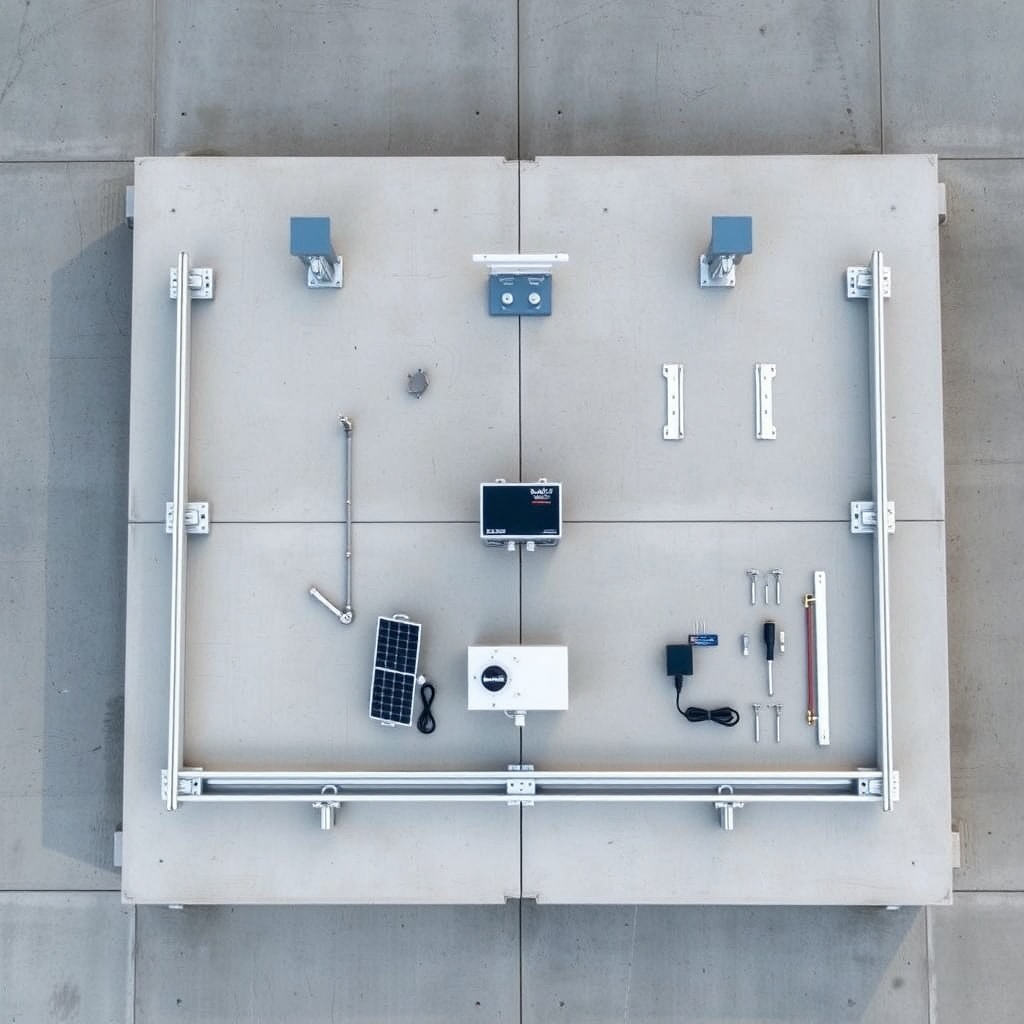
Before beginning, gather all necessary components and tools. The Fafco Solar Bear ground mount kit includes aluminum rails, stainless steel hardware, and adjustable tilt brackets. You will also need the Fafco Solar Bear collector panels themselves, along with standard plumbing fittings.
Essential Tools Checklist
- Power drill with masonry bits for concrete anchors
- Socket wrench set (metric and standard)
- Torpedo level and string line
- Measuring tape and chalk line
- PVC primer and cement (for plumbing connections)
- Safety glasses, gloves, and sun protection
Specific Material Requirements
| Component | Quantity (per panel row) | Notes |
|---|---|---|
| Fafco Solar Bear collector panel | 4–6 (typical array) | Size 4×10 ft or 4×20 ft |
| Aluminum ground mount rail | 2 per panel row | Pre-drilled for panel clips |
| Adjustable tilt bracket kit | 2 per rail end | Includes pivot pins and bolts |
| Concrete anchor bolts (1/2 x 5 in.) | 4 per bracket | For slab or footer attachment |
| Panel clip and gasket sets | 4 per panel corner | UV-resistant rubber grommets |
| Header pipe kit (1.5- or 2-inch PVC) | As per array layout | Includes unions and valves |
For a detailed sizing guide, refer to How Many Fafco Solar Bear Panels Do You Need? A Sizing Guide to calculate the exact number of panels based on pool volume and climate.
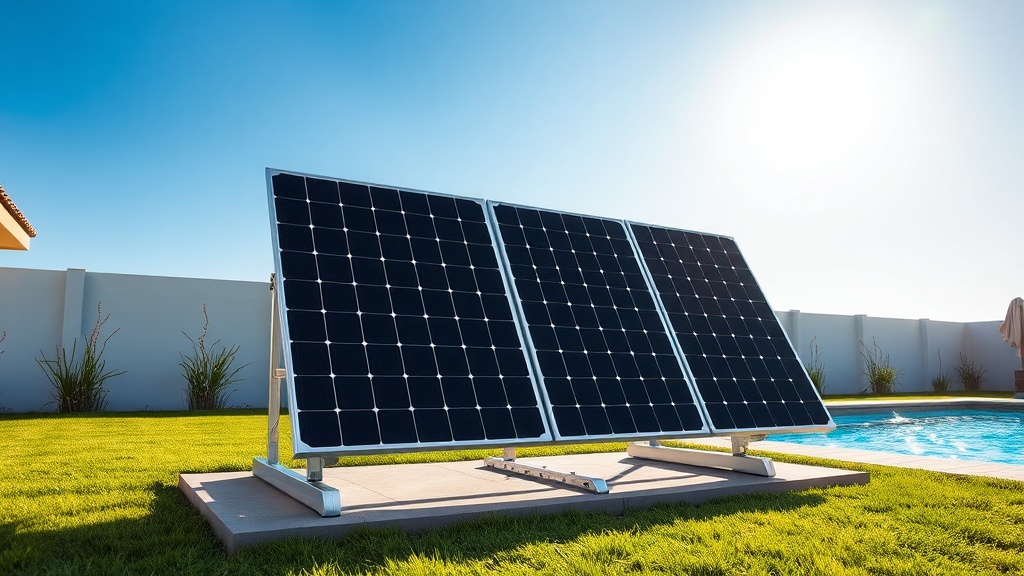
How to Prepare the Ground Mount Site Properly
Site preparation directly affects the longevity and performance of the ground mount system. The Fafco Solar Bear ground mount requires a stable, level foundation to prevent racking or shifting over time. Start by selecting a location that receives unobstructed sunlight from 10 a.m. to 4 p.m. during the swimming season.
Step 1: Mark the Array Footprint
Using stakes and string, outline the area where the panels will sit. For a typical 4-panel array (4 ft by 40 ft total), allow an extra 2 ft on each side for service access. Ensure the long axis runs true north-south for maximum southern exposure if located in the northern hemisphere.
Step 2: Prepare the Base
Two common foundation options exist: a poured concrete slab (4-inch thick minimum) or precast concrete footers. For a slab, excavate 6 inches, add a gravel base, and pour concrete with a slight slope (1/8 inch per foot) for drainage. Alternatively, use 2-ft square precast pavers at each bracket point, level them, and allow 48 hours for curing.
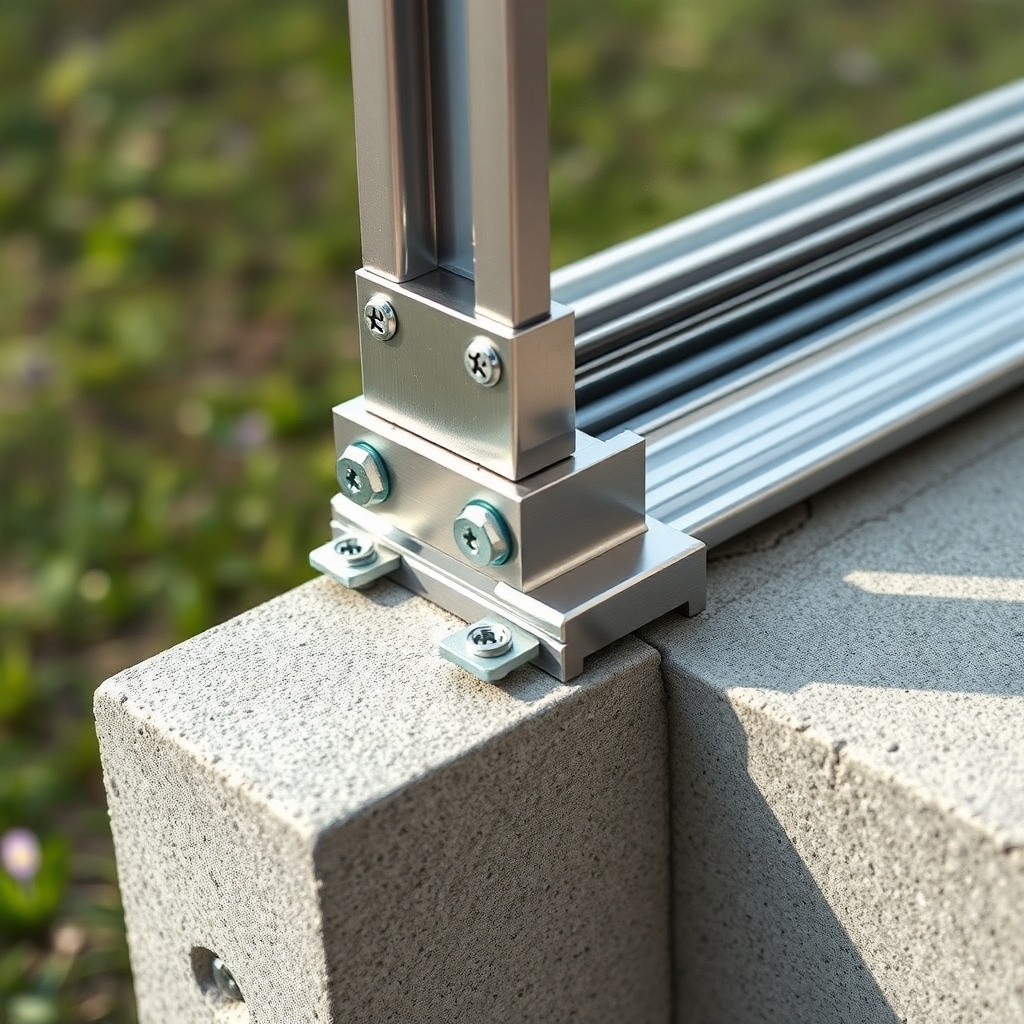
Step 3: Anchor Installation
Once the concrete is cured, mark the bracket locations. Drill pilot holes, insert expanding concrete anchors, and tighten each bracket to the manufacturer’s torque specification (typically 40 ft-lb). Use a torque wrench to avoid over-tightening, which can crack the concrete.
For guidance on the optimal tilt angle and panel spacing, see Fafco Solar Bear Roof Mounting Kit: Step-by-Step Installation for tilt angle calculations that apply to ground mounts as well.
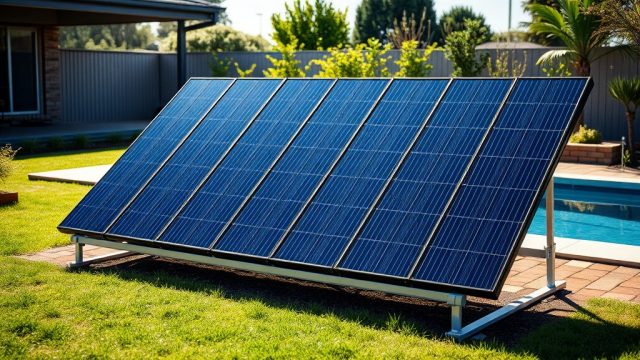
How to Assemble the Fafco Solar Bear Ground Mount Frame
With the anchors set, the frame assembly begins. The Fafco Solar Bear ground mount uses modular aluminum rails that snap together with interlocking connectors. This design allows easy expansion if you add panels later.
Step 1: Attach Tilt Brackets
Bolt each adjustable tilt bracket to the concrete anchors. The brackets have multiple height settings to achieve a tilt angle from 10° to 45°. For year-round use, set the tilt equal to your latitude minus 10° for summer, or latitude plus 10° for winter. A 30° tilt works well for most U.S. locations.
Step 2: Install the Lower and Upper Rails
Slide the aluminum rails into the tilt bracket channels. Use provided splice plates to join multiple rail sections end-to-end. Check level with a torpedo level and adjust the bracket height accordingly. Tighten all bolts to 25 ft-lb.
Step 3: Insert Panel Support Clips
Each panel corner requires a clip. Slide the clip into the rail channel, place a UV-resistant gasket between the clip and panel to prevent metal-to-plastic contact, and hand-tighten. Do not overtighten, as the Fafco Solar Bear panel frame is designed to flex slightly under thermal expansion.
After completing the frame, perform a pressure drop analysis to ensure plumbing diameters match the array size. Check Fafco Solar Bear Pressure Drop Analysis: What You Need to Know for pressure drop calculations.
How to Connect the Plumbing and Solar Bear Panels
Proper plumbing connections prevent leaks and ensure balanced water flow through all panels. The Fafco Solar Bear panels have standard 1.5-inch FPT ports, though 2-inch headers are recommended for arrays over six panels (flow rate above 12 GPM).
Step 1: Install Header Manifolds
Use schedule 40 PVC for all headers. Install a shut-off valve on both the supply and return lines for isolation during maintenance. Connect a union at each panel connection to allow individual panel removal. For the supply header, install a flow meter to monitor performance.
Step 2: Attach Panels to Frame
Lower each Fafco Solar Bear panel onto the support clips. Align the ports with the header fittings. Apply PVC primer and cement to both mating surfaces, then twist the fitting into place. Hold for 15 seconds to ensure a seal. Repeat for all panels, working from one end to the other.
Step 3: Pressure Test the System
Before burying pipes or closing access, pressurize the system to 50 PSI with a hand pump and water. Inspect every joint for leaks. Allow the pressure to hold for 30 minutes. If it drops more than 2 PSI, locate and repair the leak. A guide such as Fix a Leaking Fafco Solar Bear Collector Panel can assist with leak identification and repair techniques.
How to Wire the Controller and Automation System
Integration with a solar controller is critical for automatic operation. The Fafco Solar Bear system pairs with most major controllers, including the IntelliCenter and EasyTouch. The ground mount requires running sensor wires from the collector array to the controller unit near the pool equipment.
Step 1: Mount the Controller
Place the controller in a weatherproof enclosure at least 5 ft from the pool edge. Use the Fafco Solar Bear controller kit, which includes a temperature sensor with a 25-ft cable. For detailed programming steps, see Fafco Solar Bear Solar Controller Settings Guide.
Step 2: Install Collector Temperature Sensor
Insert the sensor into the return header port on the collector array. Secure it with a sensor well and wire tie to prevent movement. Route the wire through PVC conduit back to the controller to avoid UV damage.
Step 3: Connect to the Automation System
If integrating with a home automation system, the Fafco Solar Bear controller has a dry contact relay output. Wire this to a low-voltage input on the automation platform. Refer to Fafco Solar Bear Automation System Integration: Controllers and Timers for wiring diagrams and setup.
What Owners Say About the Fafco Solar Bear Ground Mount
Owners consistently report high satisfaction with the ground mount system, particularly for its ease of installation and reliable performance. Many note that the ability to adjust tilt seasonally improved pool water temperature by 4–6°F compared to a fixed roof mount.
John from Phoenix, Arizona, shared: “Installed the ground mount in an afternoon with a friend. The panels sit at 30° tilt and easily handled 110°F days. No leaks after two seasons.” From Colorado, Anne said: “We get heavy snow, but the ground mount is easy to clear with a broom. The tilt allows snow to slide off quickly.” A few owners mention that the concrete slab is essential in windy areas; one user replaced stakes with slab after a storm shifted the frame.
Overall, owners rate the system 4.7 out of 5 stars, with high marks for durability and the clear instructions. The only common criticism is the upfront cost of concrete work, though most agree it pays for itself in energy savings within 3–4 years.
Frequently Asked Questions
Q: Can I install the Fafco Solar Bear ground mount on grass or dirt?
A: No, the ground mount requires a stable base such as a concrete slab, concrete footers, or a gravel pad. Soft soil or grass will cause the frame to shift over time, leading to panel misalignment and potential leaks.
Q: What is the maximum panel array size for one ground mount frame?
A: The Fafco Solar Bear ground mount kit supports up to 8 standard panels (4×20 ft each) in a single row. For larger arrays, multiple frames are installed side by side with a 2-ft gap for service access.
Q: How long does a typical ground mount installation take?
A: With two people, site preparation and concrete curing take 2–3 days. The actual frame assembly and panel installation take one full day. Plumbing and controller setup add another 4–6 hours, totaling approximately 3–4 days from start to finish.
Q: Does the ground mount void the Fafco Solar Bear warranty?
A: No, using the official Fafco Solar Bear ground mount kit does not void the panel warranty. However, using non-approved hardware or failing to follow the tilt angle guidelines (10°–45°) may void the structural warranty.
Q: What is the cost of the ground mount kit?
A: A complete Fafco Solar Bear ground mount kit for a 4-panel array costs approximately $1,200–$1,800, including rails, brackets, and hardware. Concrete slab work adds $500–$1,000 depending on local labor rates. Total installed cost typically ranges from $2,500–$4,000.
Q: Can I use the ground mount in a freeze-prone climate?
A: Yes, the Fafco Solar Bear panels are freeze-tolerant down to –20°F when installed with proper drainage. The ground mount’s tilt angle facilitates water drainage to prevent freeze damage. Add automatic drain-back valves for extra protection.