How to Spot a Leak in Your Fafco Solar Bear Collector Panel
Leaks in a Fafco Solar Bear collector panel can undermine your pool heating efficiency and lead to wasted water. Recognizing the early signs—like a sudden drop in pool water level, damp spots on the roof, or a persistent “hissing” at the manifold—allows you to address the issue before it escalates into a full panel failure. This guide walks you through the most common leak points on the Fafco Solar Bear system, from cracked header tubes to loose compression fittings, and provides practical steps for temporary repairs and permanent fixes using standard tools and replacement parts.
What Are the Most Common Leak Points on a Fafco Solar Bear Panel?
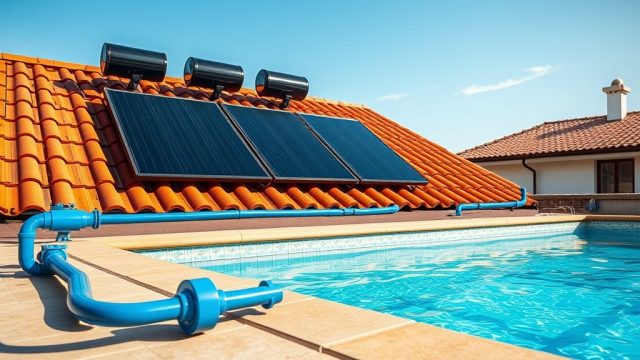
The Fafco Solar Bear uses a tubular EPDM (ethylene propylene diene monomer) rubber manifold design, which is durable but can degrade over time due to UV exposure and freezing. The most frequent leak locations are:
- Header tube cracks: These occur along the rubber manifolds at the top or bottom of the panel, often from ice expansion during winterization neglect.
- Compression fitting failures: The injection-molded plastic fittings where the feed line connects to the panel can crack if overtightened or aged.
- Tubing punctures: Sharp debris, hail, or roof traffic can create small holes in the individual absorber tubes.
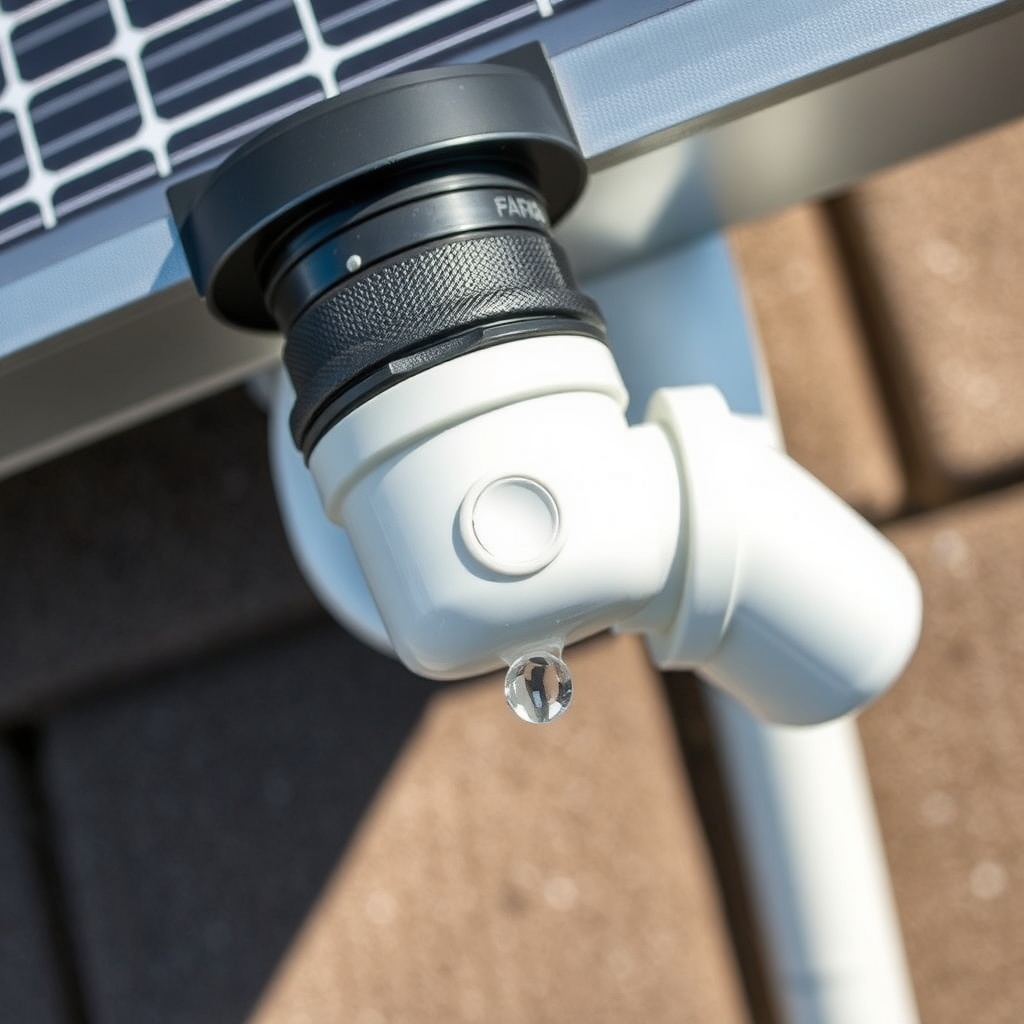
- Manifold end cap leaks: The rubber caps at the ends of the header can split or lose their seal after years of thermal cycling.
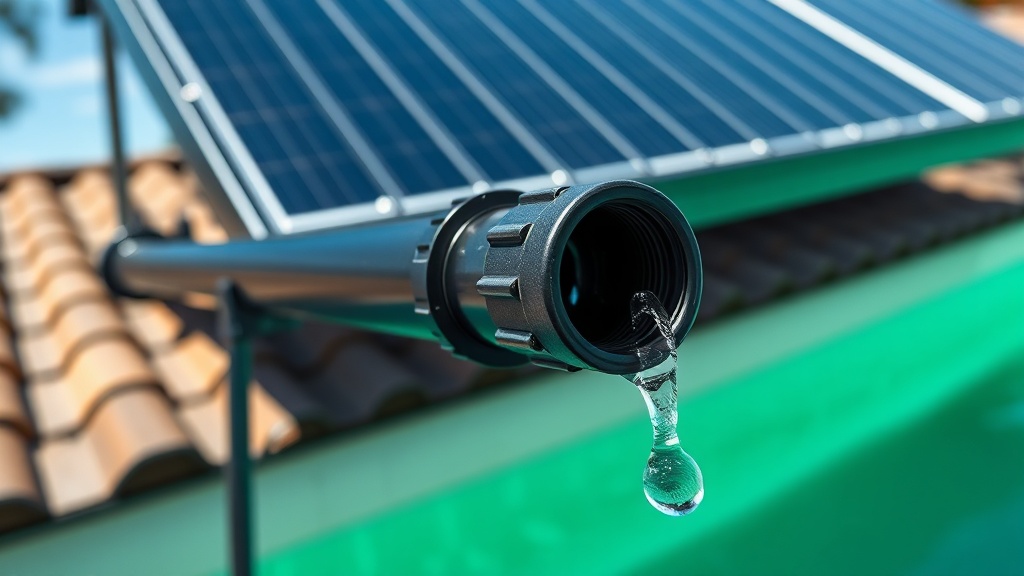
If you see a steady drip or a fine spray during operation, the leak is probably at a fitting. A slow, weeping leak that only appears when the pump runs points to a hairline crack in the rubber. For a comprehensive repair guide specific to Fafco panels, check Fafco Solar Bear Roof Mounting Kit: Step-by-Step Installation, which covers removal steps needed for major repairs.
How Do I Temporarily Patch a Small Hole in the EPDM Tubing?
For a pinhole or small tear (less than 1/8 inch) in the absorber tube, you can apply a temporary patch using an EPDM-compatible rubber repair epoxy or a flexible patch kit designed for pool solar panels. Follow these steps:
- Shut down the system: Turn off the pump and relieve pressure by opening the air bleeder valve on the panel manifold.
- Clean the area: Scrub the rubber tube with isopropyl alcohol and a rag to remove dirt and oils. Let it dry for 10 minutes.
- Apply the patch: Mix a two-part marine-grade epoxy (like 3M Marine Epoxy) and spread a thin layer over the hole, extending 1 inch beyond the edges. Press a small piece of rubber patch material over the wet epoxy.
- Let it cure: Wait at least 4 hours before restarting the system—ideally overnight if temperatures are below 15°C (59°F). This patch holds for up to one season, but it’s not a permanent fix if the underlying rubber is brittle.
For holes larger than 1/4 inch, you will need to replace the affected tube section. The How Many Fafco Solar Bear Panels Do You Need? A Sizing Guide can help you determine if adding a new panel is more cost-effective than repairing a severely damaged one.
Can I Replace a Leaky Manifold End Cap Myself?
Yes, replacing the rubber end cap on a Fafco Solar Bear manifold is a straightforward DIY task that usually takes under 30 minutes. The end caps are held on by a stainless steel band clamp and a friction fit over the rubber header. Here’s the procedure:
- Step 1: Drain the panel. Open the suction-side valve and let gravity drain the water out. If the panel is always wet, use a small bucket to catch residual water.
- Step 2: Loosen the band clamp with a flathead screwdriver. Slide it off the old cap.
- Step 3: Pull the old cap off the header tube. Use a dental pick or small screwdriver to clean any debris from the header’s inner ridge.
- Step 4: Apply a thin layer of silicone lubricant (non-petroleum) to the inside of the new cap. Slide it onto the header until fully seated.
- Step 5: Reinstall the band clamp over the cap’s reinforcing bead. Tighten just enough to prevent twisting—overtightening can crack the rubber. A hand-tight plus 1/4 turn on the screw is standard.
The cost of a replacement Fafco Solar Bear end cap is typically around £8 to £12 (approx. $10 to $15 USD) from a pool supply retailer. Always buy caps specifically marked for Fafco Solar Bear—generic rubber caps may not fit the 1-inch internal diameter manifold.
| Symptom | Severity Level | Urgency |
|---|---|---|
| Fine spray at a compression fitting during pump operation | Low | Usually not urgent—can wait for a dry day to tighten fitting |
| Steady drip from manifold end cap (more than 5 drops per minute) | Medium | Needs attention soon—can cause water loss and roof staining |
| Visible crack in rubber header tube with water weeping | High | Needs attention soon—may worsen and cause panel failure |
| Multiple pinhole leaks along a single tube | High | Urgent—tube replacement or panel bypass required |
| Water pooling on roof beneath a panel after rain or system off | Low to Medium | Usually not urgent if system is off—inspect when dry |
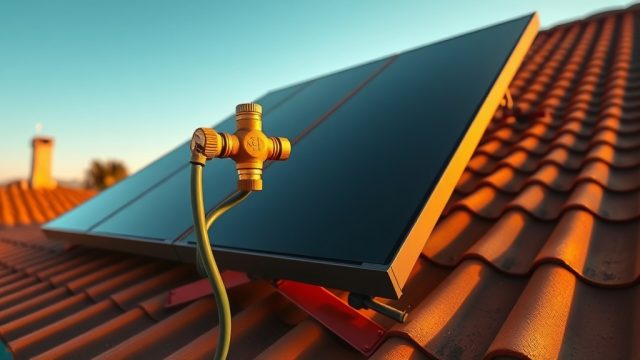
How Do I Fix a Cracked Compression Fitting Without Replacing the Entire Panel?
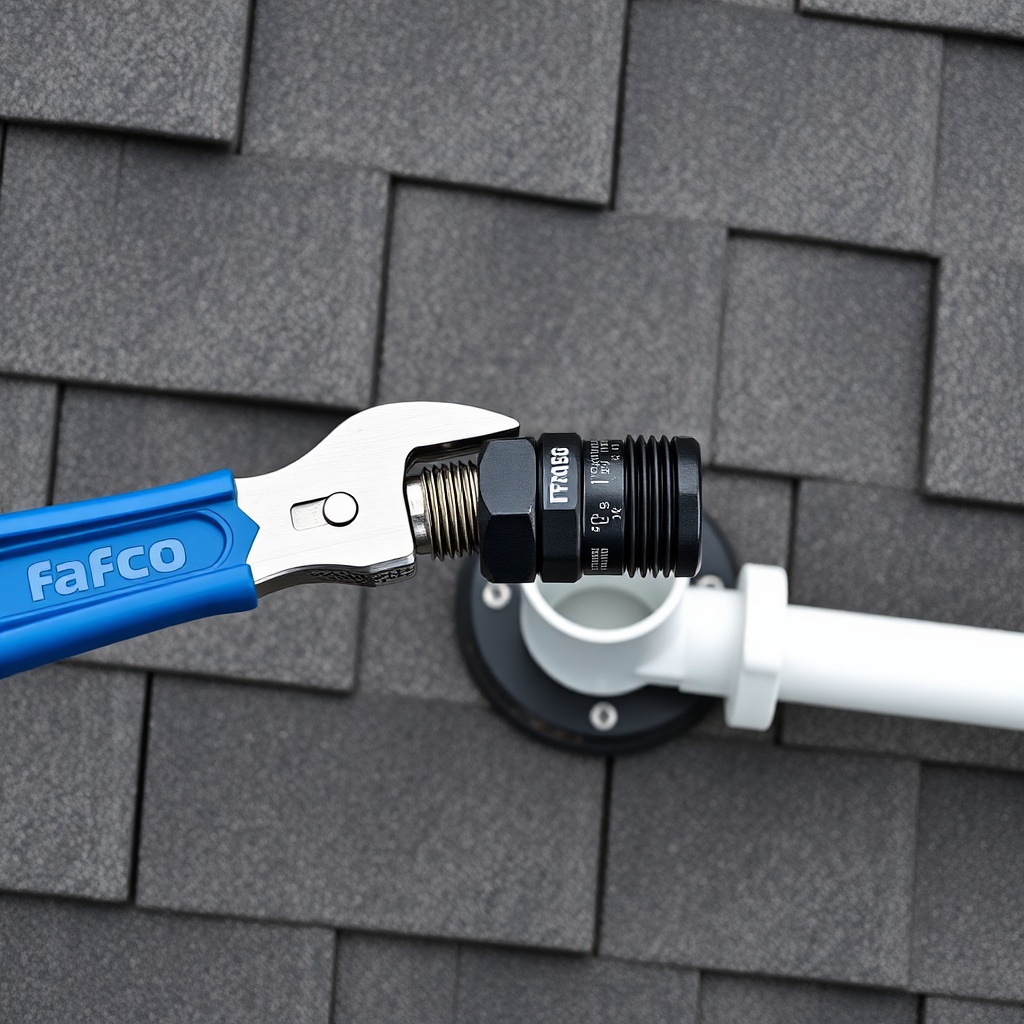
Cracked compression fittings are one of the most fixable problems on a Fafco Solar Bear. The fitting is a plastic coupler that connects the 1-inch black rubber supply hose to the panel’s header tube. You can replace only the fitting without removing the whole panel. Here’s the repair sequence:
- Tools needed: Adjustable wrench, pipe cutter or hacksaw, plastic deburring tool, new Fafco compression fitting (part number 50-1067 or equivalent), PTFE tape (Teflon tape), and silicone grease.
- Procedure: Cut the supply hose about 2 inches behind the cracked fitting using a pipe cutter (for a clean, square cut). Unscrew the old fitting from the panel manifold with the wrench—be gentle to avoid stripping the plastic threads. Clean the threads on the manifold with a rag. Wrap 2 to 3 layers of PTFE tape clockwise around the male threads of the new fitting. Hand-tighten the fitting into the manifold, then use the wrench for 1/4 turn extra—stop if you feel resistance. Lubricate the hose end with silicone grease, push it fully onto the barb of the fitting, and secure the compression nut hand-tight plus 1/4 turn with a wrench.
- Cost: A Fafco replacement compression fitting costs around £6 to £10 (approx. $8 to $13 USD). This repair is much more economical than a whole new panel, which may run £200 to £400 (approx. $250 to $500 USD) for a 4×20-foot unit.
If the fitting crack is on the manifold side (the threaded port), not the hose side, you may need to replace the entire manifold header tube—a job best left to a pro because it requires separating the rubber header from the absorber tubes. For controller calibration after a major repair, see Fafco Solar Bear Solar Controller Settings Guide.
What Steps Should I Follow for a Permanent Repair of a Split Header Tube?
A split in the rubber header tube (the main manifold running across the top or bottom of the panel) is a more serious issue. A temporary patch with rubber adhesive may hold for a few weeks, but a permanent fix involves replacing the affected header segment. The process requires drain-down, removal of the panel from its roof mounts, and disassembly of the absorber tubes. If you are not comfortable with this, hiring a professional is recommended. However, for confident DIYers, here is a summary:
- Drain panel completely: Open both the supply and return valves, and disconnect the hoses. Let the panel gravity-drain for at least one hour.
- Remove the panel: Unbolt the mounting brackets from the roof rack. Gently slide the panel off the roof—get help, as a 4×20-foot panel weighs about 60 pounds (27 kg) when dry.
- Access the split: Use a utility knife to cut the rubber header tube at the split point, removing 2 inches of damaged material. Pull the absorber tubes out of the header—they are held by friction and a rubber gasket.
- Install a new header segment: Purchase a replacement Fafco header tube splice kit (part number 50-0082, about £15 to £20 / $18 to $25 USD). The kit includes a rubber coupler and two band clamps. Slide the coupler over one end of the existing header, then insert the new header segment, and tighten the clamps evenly.
- Reassemble and test: Reinsert absorber tubes, reassemble the panel onto the roof, and reconnect hoses. Pressure test with the pump for 10 minutes—watch for weeping at the splice points.
This repair restores the panel to near-original integrity. Expect the job to take 2 to 4 hours for a single panel. If the panel is more than 10 years old and has multiple issues, consider a full replacement—new Fafco Solar Bear panels are reasonably priced and may offer better efficiency.
What Owners Say
Seasoned owners of Fafco Solar Bear systems share practical experiences from real-world repairs. “I patched a pinhole with marine epoxy last July, and it held through the whole summer. Come autumn, I had to drain the panel anyway for winterization—that’s when I replaced the fitting. The epoxy trick buys you time, but you don’t want to push it past one season,” one homeowner reports. Another emphasizes the importance of proper tightening: “The compression fitting crack was my own fault. I used a wrench like I was torquing a car tire—snapped the plastic. The $10 replacement was easy, but now I only hand-tighten.” A third owner notes a more complex case: “The water leak was intermittent—only showed up when the pump ran. Turned out to be a hairline crack in the manifold elbow. Ended up replacing the whole manifold header with a splice kit. Took a Saturday afternoon, but it’s been dry for two years now.”
Frequently Asked Questions
Can I use a rubber patch from a bicycle tire repair kit on a Fafco panel?
Generally, no. Bicycle patch rubber is not formulated to bond with EPDM rubber, especially under constant water pressure and UV exposure. The patch will likely peel off within a few days. Use an EPDM-specific patch material or marine-grade epoxy designed for flexible rubber. If you are in a pinch, a self-vulcanizing tape (like Rescue Tape) can stop a drip for a few days while you order a proper kit.
How long does a typical Fafco Solar Bear panel last without leaks?
With proper maintenance (including winter draining in freezing climates and regular inspection), the EPDM tubing and header typically last 12 to 15 years. Compression fittings may need replacement every 5 to 8 years because of UV degradation of the plastic. The rubber itself rarely fails before 10 years unless it is exposed to harsh chemicals (like high chlorine) or physical abuse.
Will a small leak make my pool cooler during sunny days?
Yes, a leak reduces the system pressure, which can cause uneven water flow through the panel. Some tubes may receive less water, leading to cold spots in the panel and lower overall heat transfer to the pool. Even a single cracked compression fitting can reduce heating efficiency by 10 to 20 percent because the water bypasses part of the panel in search of the leak path.
Do I need to replace the O-rings inside a Fafco compression fitting?
Yes, if you disassemble the compression fitting (for example, to clean debris), the internal O-ring can become flattened or deformed. Replace it with the O-ring included in a Fafco fitting rebuild kit, which costs about $4 to $6 (approx. £3 to £5). Lubricate the new O-ring with silicone grease before reassembly to prevent future leaks.
Is it safe to use a Fafco panel with a leak for a few weeks while waiting for a replacement part?
It is not recommended if the leak is more than a slow drip. A larger leak can cause air to enter the system, potentially leading to pump cavitation and damage. Additionally, water dripping on your roof for weeks can lead to algae growth on shingles or tiles. If you must wait, apply a temporary patch as described above, or run the system only when you are home to monitor it.
Can a leak in the Fafco panel affect my pool’s chemical balance?
Indirectly, yes. A leak that allows air into the system can cause carbon dioxide off-gassing, slightly raising the pool water’s pH over time. However, the effect is usually minor compared to other factors like rainfall or chemical adjustments. The bigger concern from a leak is physical damage to the panel and roof, not a significant change in water chemistry.